5 Beginner Mistakes
in Underwater Photography I wish someone told me…
by Keone Drew
There are so many useful tips that I have learned over the past few years that I wish someone would have shared with me when I first got into underwater photography. Most of these mistakes, though helpful in creating my process, could have been so much easier if I knew a few things.
Now, before we jump into this post, I recommend you practice and become proficient as a diver. Remember to always practice safety and dive within your training limits. It is important to work to improve your buoyancy, focus on your breathing, never forget to do your pre-dive checklist for your dive and your camera equipment; and continue your dive education with additional training and mentorships.
If you are beginning your journey into underwater photography, I think this month’s blog post can provide some fantastic insight. I will explore 5 Beginner MISTAKES that I wish someone told me that could help improve their underwater photography and take more bold and dramatic images.
1. Don’t Get the Most Expensive Camera
Pace yourself! Enjoy the journey! Learn as you go!
My journey began with a GoPro action camera back in 2013. After a few years, the dive shop I worked with loaned me an Olympus TG-4 compact camera. Now, I own a DSLR with underwater housing.
With each camera system, I learned the pros and cons of shooting with that camera system and its setup. You don’t need to purchase the most expensive camera, but only the one that you can afford.
Green Moray Eel shot with GoPro Hero 3+ Action Camera.
Green Sea Turtle shot with Olympus Tough TG-4 Compact Camera.
With so many options available today, I wanted to share a few useful tips that helped me to create dynamic, bold, and epic underwater photos:
Brush up on your Photography Basics (i.e., aperture, shutter speed, ISO, etc.) and how it applies to your camera.
Know how your camera works and how to make changes to your Camera’s Settings.
Shoot all your photos in the camera’s RAW-format setting. This captures the most amount of detail for post-processing.
Learn the Do’s and Dont’s that help you achieve your desired photo results.
Practice! Practice! Practice! Spend as much time as possible taking photos; good and bad, above and below the waves.
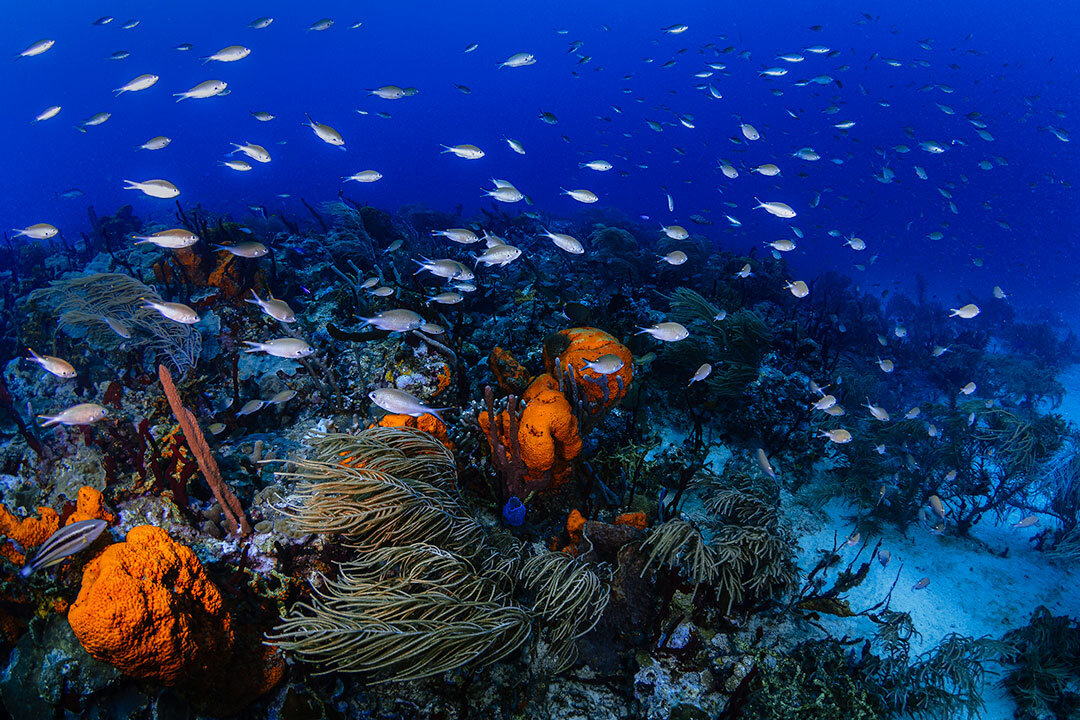
Caribbean Reef shot with Nikon D500 DSLR & Tokina Fisheye 10-17mm Lens in Nauticam Housing using INON Z330 Strobes.
Remember: Understanding your camera and its setup is more important that how much your camera system costs!
2. Visualize the Photo you Want
We all get excited when we go scuba diving or snorkeling. It’s a novel and fun experience for most, and adding a camera to take photos can get hectic! I have found that doing some pre-planning and exploring without your camera to assess potential photo locations and opportunities is extremely helpful!
Slow down and visualize the photos you want to take!
My advice is to simply enjoy the experience of the underwater world; leave your camera behind at first, and use this time to visualize what different photos you wish to take.
Engage with your surroundings and learn as much as you can about the environment. In those moments, focus on three (3) important factors:
Lighting and how it changes
Water conditions and environment (like waves, currents, visibility, etc.)
Key points of interest and the composition of the photo?
Useful Tip: The underwater environment is always changing. Visualize your photo, develop a process and be ready to adapt!
3. Lighting is Key
Take your underwater photos with the light source in mind!
If you want crisp, bold and colorful photos, remember lighting is key.
Whether you are shooting with ambient light or artificial lighting systems, ensure that your subject is properly exposed to your light source to create vibrant and colorful underwater images.
You may recall from my Quick Pro Tip in my blog post ‘4 Simple Steps for Restoring Vibrant Color in your Underwater Photos’ that most light that penetrates the surface is lost due to refraction, and most colors dissipates and loses their vibrance within the first 10m/30ft.
What does this mean for your underwater photos?
#1 With Ambient Light
When using natural light as your source, take your photos shooting up towards your subject as opposed to downwards. With unobstructed light penetration, the natural light will provide the best illumination (as light converges directly on the subject).
If however, your subject comes directly between you and the light source, you will create a silhouette (as shown below). Silhouettes can create compelling artistic images, but for visible and illuminated subjects; remember to take a moment to note the position of the sun, the angle of the light penetrating the water, and where you should position yourself to take the best photo.
#2 With Artificial Lighting Systems
In addition to shooting with ambient light, using artificial lighting systems (like strobes and video lights) helps to create crisp, bold, and vibrant underwater photos. Certainly, we can spend hours talking about artificial lighting systems, but in this blog post, we will touch on the basics.
Strobes and video lights offer lighting closer to your subject. This means you should be more mindful of the intensity of these artificial lights as well as their position. Consider only the camera settings before firing your strobes, and the subsequent adjustments to include their lighting.
There is no exact science when taking underwater images. Practicing with your gear ‘day-in & day-out” will help you to understand the changes you need to make to get consistent and amazing photos.
4. Reduce Backscatter
One of the most frustrating parts of taking underwater photos is backscatter caused by artificial lighting systems like strobes and video lights. This can ruin the best of photos!
How then can we reduce it?
There are many ways to reduce backscatter, but first, we must understand what it is. Backscatter are bright white or colored dots in your image caused by light reflected off particles in the water that have been recorded by your camera sensor.
In my experience, there are two (2) major factors that cause backscatter:
You are too far away from your subject: There is too much space between you and the subject. If you get closer to your subject, you can minimize how much backscatter is recorded by your camera sensor.
The position of your lighting system: By angling your strobes or video lights behind the lens and domes of your camera ports, you reduce the amount of light that is directly illuminating the particles in the water.
In low visibility cases, it is impossible to avoid all backscatter. This does not mean your image is completely ruined. With powerful post-processing software like Adobe Lightroom (LrC) and Photoshop (Ps) and their AI technology, you can reduce and fix backscatter. This can help salvage an otherwise ruined image. Check out the image below and how I improved this underwater photo.
Before Post-Process with Backscatter
After Post-Process removing some Backscatter
Remember: Post-Processing edits are no substitute for shooting amazing photos! Think creatively and consider these elements to make the necessary adjustments while shooting.
5. Get as Close as Possible
World-famous Hungarian-American war photojournalist Robert Capa may have said it best, “If your photographs aren’t good enough, you’re not close enough.”
A few feet away from my subject
This is extremely applicable when it comes to underwater photography; combined with these few helpful tips.
The fact that water absorbs light, if you shoot too far away, your images will be less vibrant and lack that detail and sharpness.
Reducing the distance between your camera and the subject will eliminate the number of particulates in the water lit by your strobes. Simply put, you will reduce backscatter.
Get close to your subject with your camera ready to shoot. This allows marine life to get comfortable with your presence; resulting in more dynamic photos.
About a foot away from my subject
Note: Water is much denser than air, and with more blue and green wavelengths underwater, getting as close as possible allows for more vibrant and dramatic underwater images.
As you start your journey as an underwater photographer, there are so many things that can overwhelm you in this new environment. Mastering buoyancy, remembering your training while trying to capture amazing images can be a daunting task. I hope that with this blog post these 5 Beginner MISTAKES helps to make your journey easier.
Always respect the underwater environment and keep your diving training as your priority. No photo is worth destroying the marine environment or taking risks with your life.
Good luck! Be bold and take chances with your photography
Take care for now and thanks for reading!
- Keone


