
3 Easy Ways
to Create Sharper Underwater Photos using PHOTOSHOP
by Keone Drew
Have you ever had that unfortunate instance where after taking photos, you begin your post-processing and realize that they were not as sharp as you thought? Then keep reading!
Often in underwater photography, it’s not always easy to tell the sharpness of your photos while looking at your view display below the waves. With the effects of refraction, it can be difficult to gauge the sharpness of your image underwater. This can be very disappointing when you’re back at the surface, scrolling through your previews. The process of underwater photography also means that it is not always easy nor accessible to do a quick reshoot.
If this has ever happened to you or something that you have considered, then keep scrolling. In this blog post, I will share with you 3 easy ways that I create sharper photos in my post-processing using Adobe Photoshop (Ps).
#1: Unsharp Mask Filter
Creating sharper images in post-processing is all about adjusting contrast along the edges of your photo. The primary go-to-method I use to create sharper underwater images in Photoshop is the highly effective ‘Unsharp Mask’ filter.
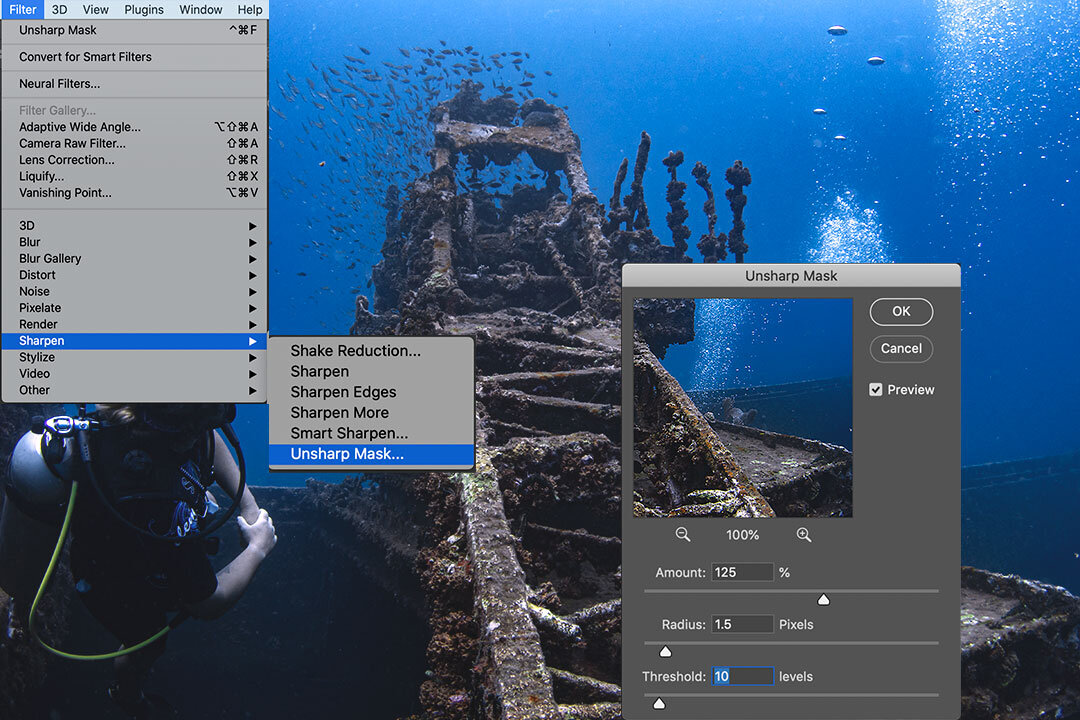
With 3 settings, this filter allows you to toggle between; ‘Amount’ – the amount of contrast applied to edges; ‘Radius’ - the thickness of that contrast on the edges; and ‘Threshold’ – the area for which the contrast is applied.
I have found that with underwater photos, using the following range of settings creates optimal sharpening:
Amount: 125 – 175% | Radius: 1.2 – 2.0 Pixels | Threshold: 5 – 10 Levels
The simplicity of selecting the Unsharp Mask and toggling between 3-settings to create your desired results can’t get any easier. I recommend to start with the highest contrast settings and work backward to get your best results.
Be mindful to not over sharpen your images!
#2: High Pass Filter (Overlay Layer)
Another technique to create sharper underwater photos is the ‘High Pass’ filter with an Overlay layer. A simple 2-step process that can improve the contrast in the edges of your image.

With only the ‘Radius’ tool to adjust, start with the lowest value moving the slider to the right until the edges of your subject are visible in the gray area. With most photos and especially in underwater images, keeping this value under 2.0 Pixels helps for optimal contrast of the edges.
Once you have selected your high pass filter adjustments, simply change the blend mode of the layer to ‘Overlay’ to reveal the filter on your image.
Remember: You can always reduce the impact of the filter adjustment by changing the opacity of the layer.


#3: Blur Background
Adding a blur to the background of your underwater photo can give the impact of a shallower depth of field (or a ‘bokeh’ effect). This allows the subject of your image to be more in-focus and appear sharper to your audience. With Adobe Photoshop’s 2021 new AI technology updates, it’s easier for photographers to add this effect in post-processing. Here’s what I did to transform my underwater image easier and with fewer clicks.

View More to access more Quick actions (shown below)

Select your background layer; using the new AI tools, choose the ‘Quick actions’ step to Blur background.
This automatically creates the following steps with 1-click:
Makes a copy of the background layer;
Selects the subject of that layer
Converts this copy to a smart object;
Creates a layer mask of the background; and
Applies a Gaussian blur filter to the background

Now, using the brush tool on the layer mask created, you can make localized changes to the blurred background by editing the areas that are affected by the ‘Gaussian Blur’ filter.
Remember: With layer masks, a “white” brush tool reveals, while a “black” brush tool hides.
In addition, since the ‘Quick actions’ step tool created a separate smart object copy of your background layer, you can also make changes to the Gaussian blur filter. If the background is blurred too much, this creates blurred edges on your subject and reduces the impact of this method.
In this instance, I recommend you keep the ‘Radius’ between 6.0 to 9.0 Pixels to ensure an optimal effect.
Check out the Final Processed Photos!

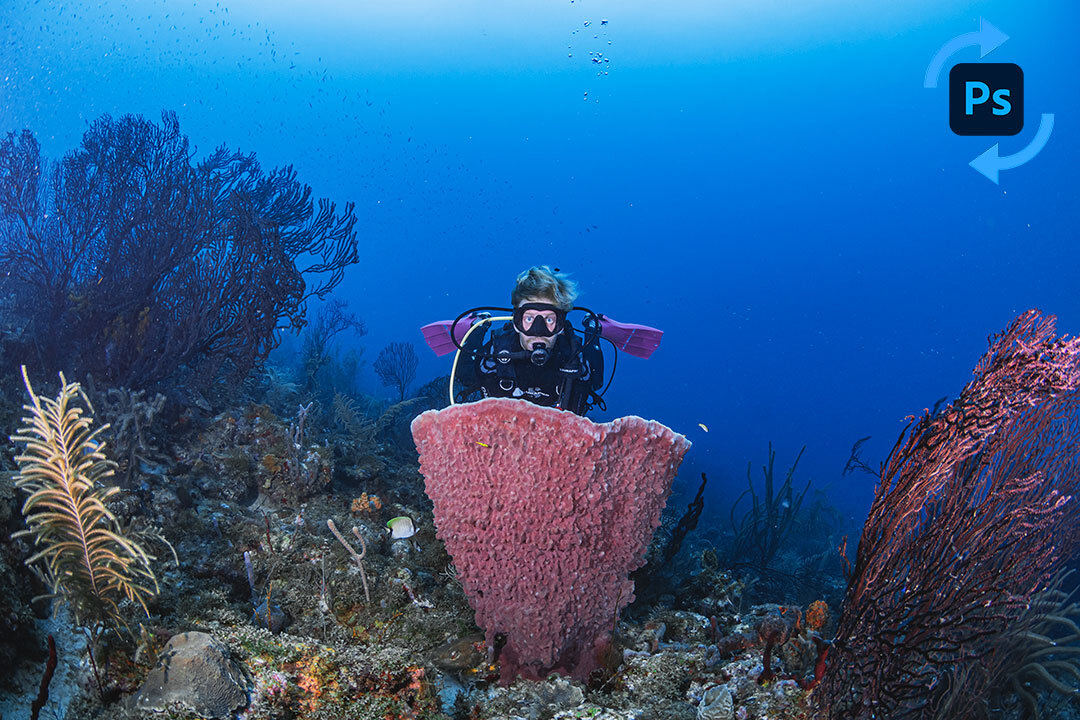
Diver admires the Welded Crane Section of the Veronica L. Shipwreck located on the seabed off the St. George’s Harbor in Grenada

Diver hovers over the Vicissitudes Sculpture located in the Marine Protected Area Molinere Bay in Grenada

Giant Green Moray Eel greets Divers on Coral Reef in Grenada
There are so many ways to enhance your underwater photography; by no means are these 3 easy ways a comprehensive list of techniques. However, having spent countless hours editing my photos, I wanted to share some of the simplest and most effective techniques. Use them as a starting point to take your photos to the next level.
I really do hope that this blog post provides some value on how you too can create sharper underwater images using Adobe Photoshop. Do not hesitate to add a comment if you have any questions or would like to learn more.
Remember, be bold and take chances with your photography.
Take care for now and thanks for reading!
- Keone