
4 Simple Steps
for Restoring Vibrant Color in your Underwater Photos using LIGHTROOM
by Keone Drew

Have you ever noticed how your underwater photos result in more blue and green imagery? With so many vibrant photos shared in magazines and on social media platforms; this could be daunting tasks for new photographers wanting to try their hand at underwater photography. Do you ever wonder how you can restore the vibrant colors lost in your images?
For those with any underwater photography experience know that any images taken underwater will result in largely blue and green colors. This has to do with the loss of light (check out my Quick Pro Tip in this post). And though water quality, visibility, clarity, and weather conditions do play an important role, I have found that restoring vibrant color in underwater photos can be achieved simply in post-processing.
In this blog post, I will share with you the 4 simple steps that I follow that help me to bring back vibrant color in my underwater images using Adobe Lightroom (LrC).
STEP 1: Adjusting White Balance (WB)
First, be sure that your camera settings are adjusted to take photos in a RAW format before your shoot. This allows you to capture the most amount of details possible in your image.
Next, in your post-processing software (I am using Adobe Lightroom Desktop Classic), select the white balance paint dropper tool to choose a part of your image that you think represents the color white. This allows Lightroom’s AI technology to adjust the image based on its interpretation of ‘True White’ – aligning the full spectrum of colors by adjusting the temperature and tint of your image.
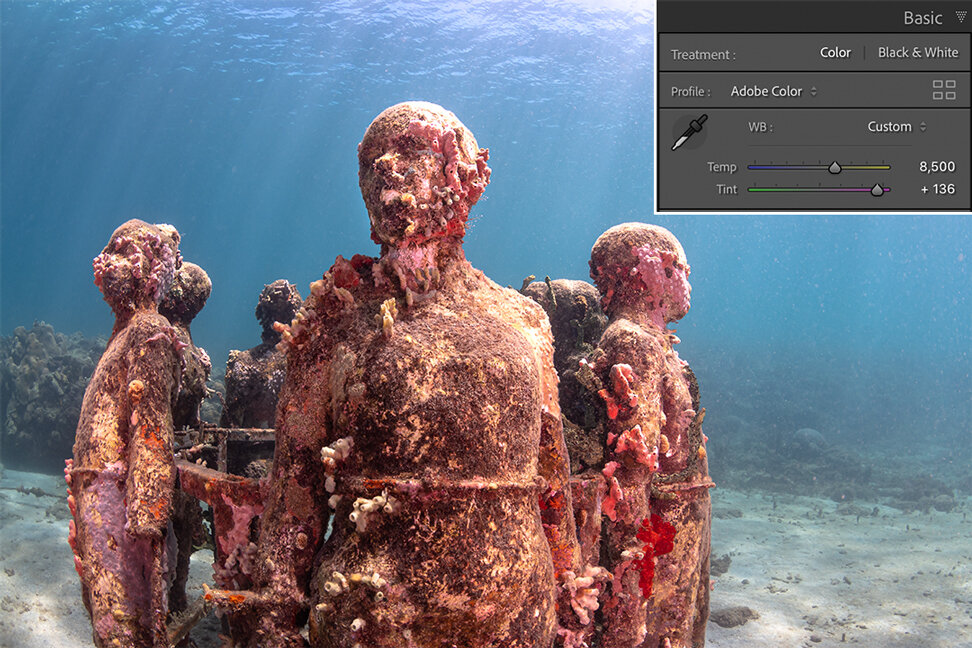
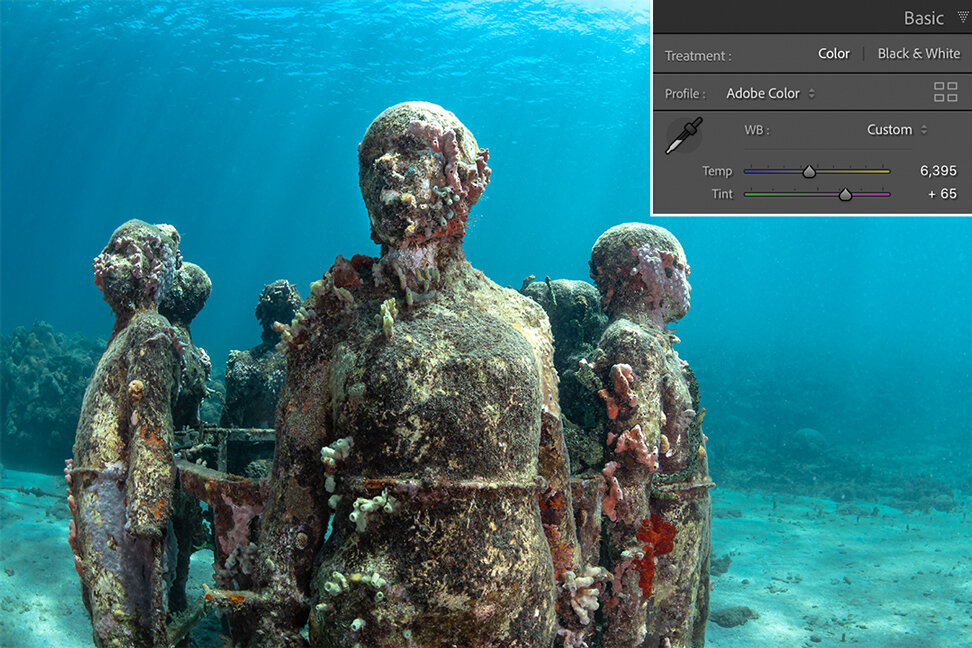
Here, I begin the process of restoring vibrant color to my underwater image by using the WB tool to adjust for the excessive blue and green colors in my photo.
Do remember that Lightroom’s Auto WB adjustments are based on its interpretation and AI technology. This should simply be your starting point. As the photographer, you should make individual adjustments to temperature and tint to adjust the WB based on your experience taking the photo and to achieve your desired results. Check out the comparisons shown above, and the simpe adjustments that I made.
STEP 2: Color Correction using Hue, Saturation and Luminance (HSL)
To understand what adjustments you could make, let’s start with a simple definition of each of these terms.
Hue - represents the shift in colors;
Saturation - describes the boldness of that color, and
Luminance - is the brightness or darkness of the color.
This simple step involves the process of moving each color slider (left or right) to correct for the loss of light underwater; adjusting each slider to restore those colors that you believe may have been lost underwater.
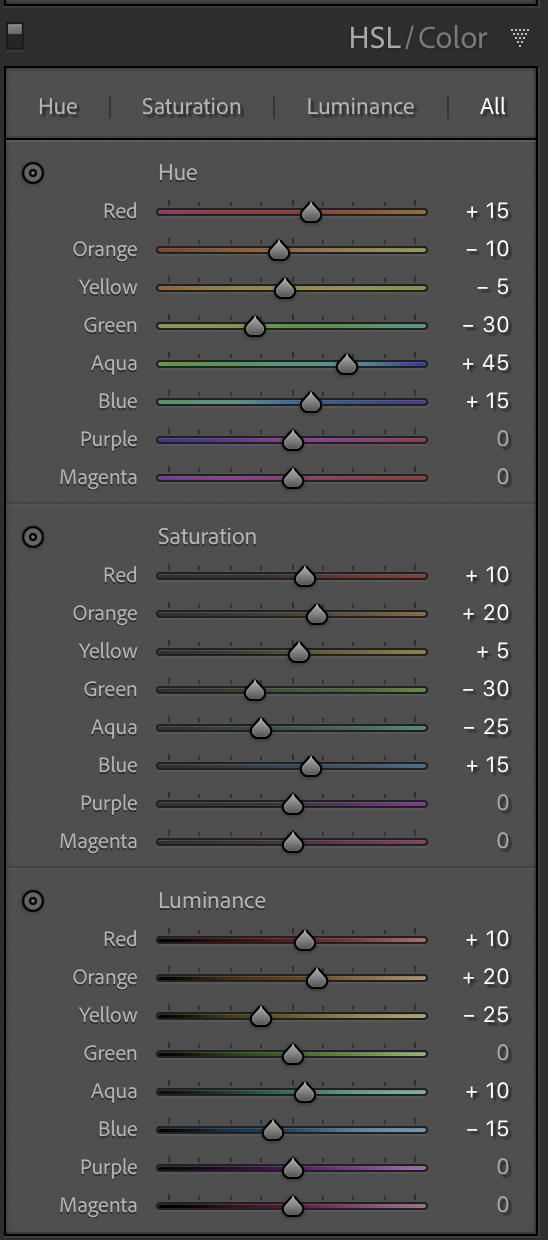
Typically, I begin with adjusting Aqua and Blue colors. Next, I toggle the slider for Red, Orange, and Yellow to help restore the vibrance lost.
See the visual aid below to help you understand how light travels through water, and how colors are lost as we go deeper underwater.

Here’s a ‘Quick Pro Tip’ that I teach my scuba diving students about Loss of Light underwater with the illustration above.
Loss of light is due to Refraction - the phenomenon of light being deflected through a medium such as water. This results in these first three colors - red, orange, and yellow dissipating and losing their vibrance within the first 10m/30ft. underwater.
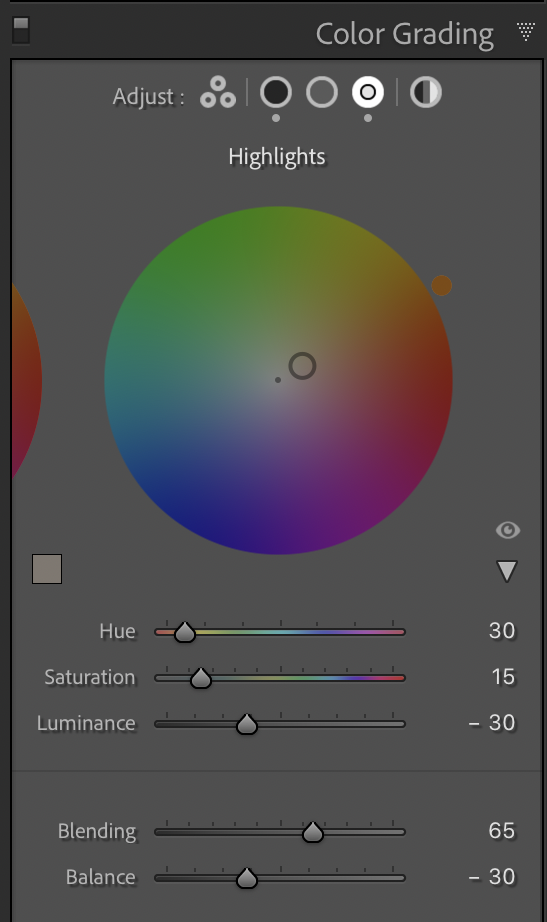
STEP 3: Color Grading
Don’t mistake color grading for color correction. In step 2, we did color correction to adjust our image and restore colors that were lost due to refraction.
On the other hand, color grading is choosing the style you wish your audience to see.

Adjusting color tones in the Highlights, Shadows and Midtones allow you to put your style on the image; giving the vibrance and impact that you desire.
Focus on using complementary color tones in Highlights and Shadows to create dynamic and compelling underwater photos.
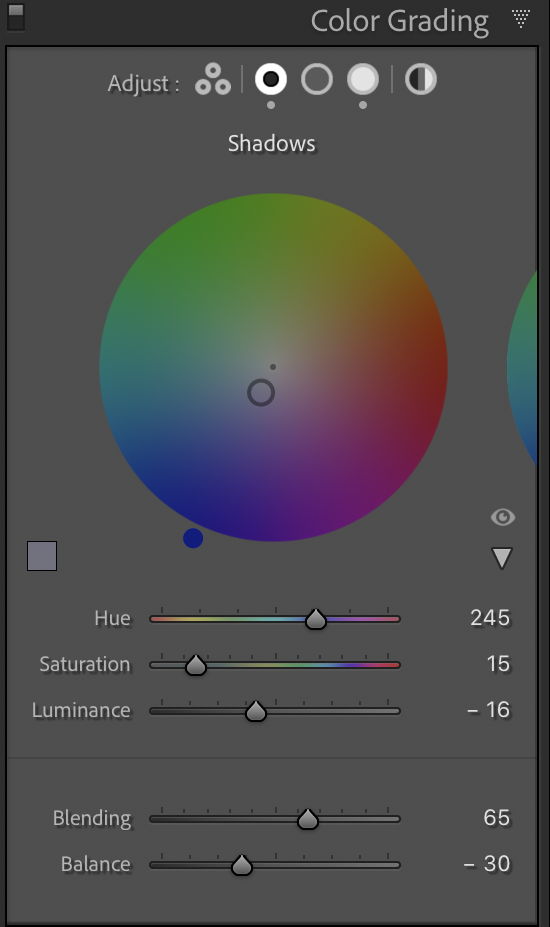
Do Remember: Photography is always subjective, and color grading is your chance to place your stamp on your photos.
STEP 4: Calibration
Finally, calibration can be considered an optional step in your post-processing. However, the tweaks made here could result in creating that vibrant image that you were not able to achieve in the previous steps.
Using the calibration tool, you can further alter the color spectrum of the image to achieve your desired style and enhance the color profile of your photo. Please be sparing in your use, as it can impact other changes made previously.
Don’t miss this step the next time you are editing your underwater photos!

Check out the Final Results!
What do you think? Drop me a comment below and let me know if you have any questions.

Photo taken of the reconstructed original ‘Vicissitudes’ Sculpture by the artist/sculptor @Jason deCaires Taylor.
I really do hope that this blog post provides you with some useful information to restore vibrant colors to your underwater photos. Do not hesitate to add a comment if you have any questions or would like to learn more about restoring vibrant color to your images.
Your photography should be based on your experiences.
Remember, be bold and take chances with your photography.
Take care for now and thanks for reading!
- Keone